Fun and Festive Holiday Snow Globes/Mini Jar Cloches
We have all seen a ton of those little faux snow globes all over the blogs and Pin Interest. You know the ones...made with mason jars with little snowy scenes inside? Most of them do not have water in them, so I am hesitant to call them just snow globes because they are more like Mini Jar Cloches. Don't you think?! Anyway, I was wanting to tackle this project with my own twist or vision on it. So here is what I did.
Collected up some supplies...little pretties and a few Dollar Store jars and couple of jars I picked up at Goodwill because I thought the triangular shape of them was different.
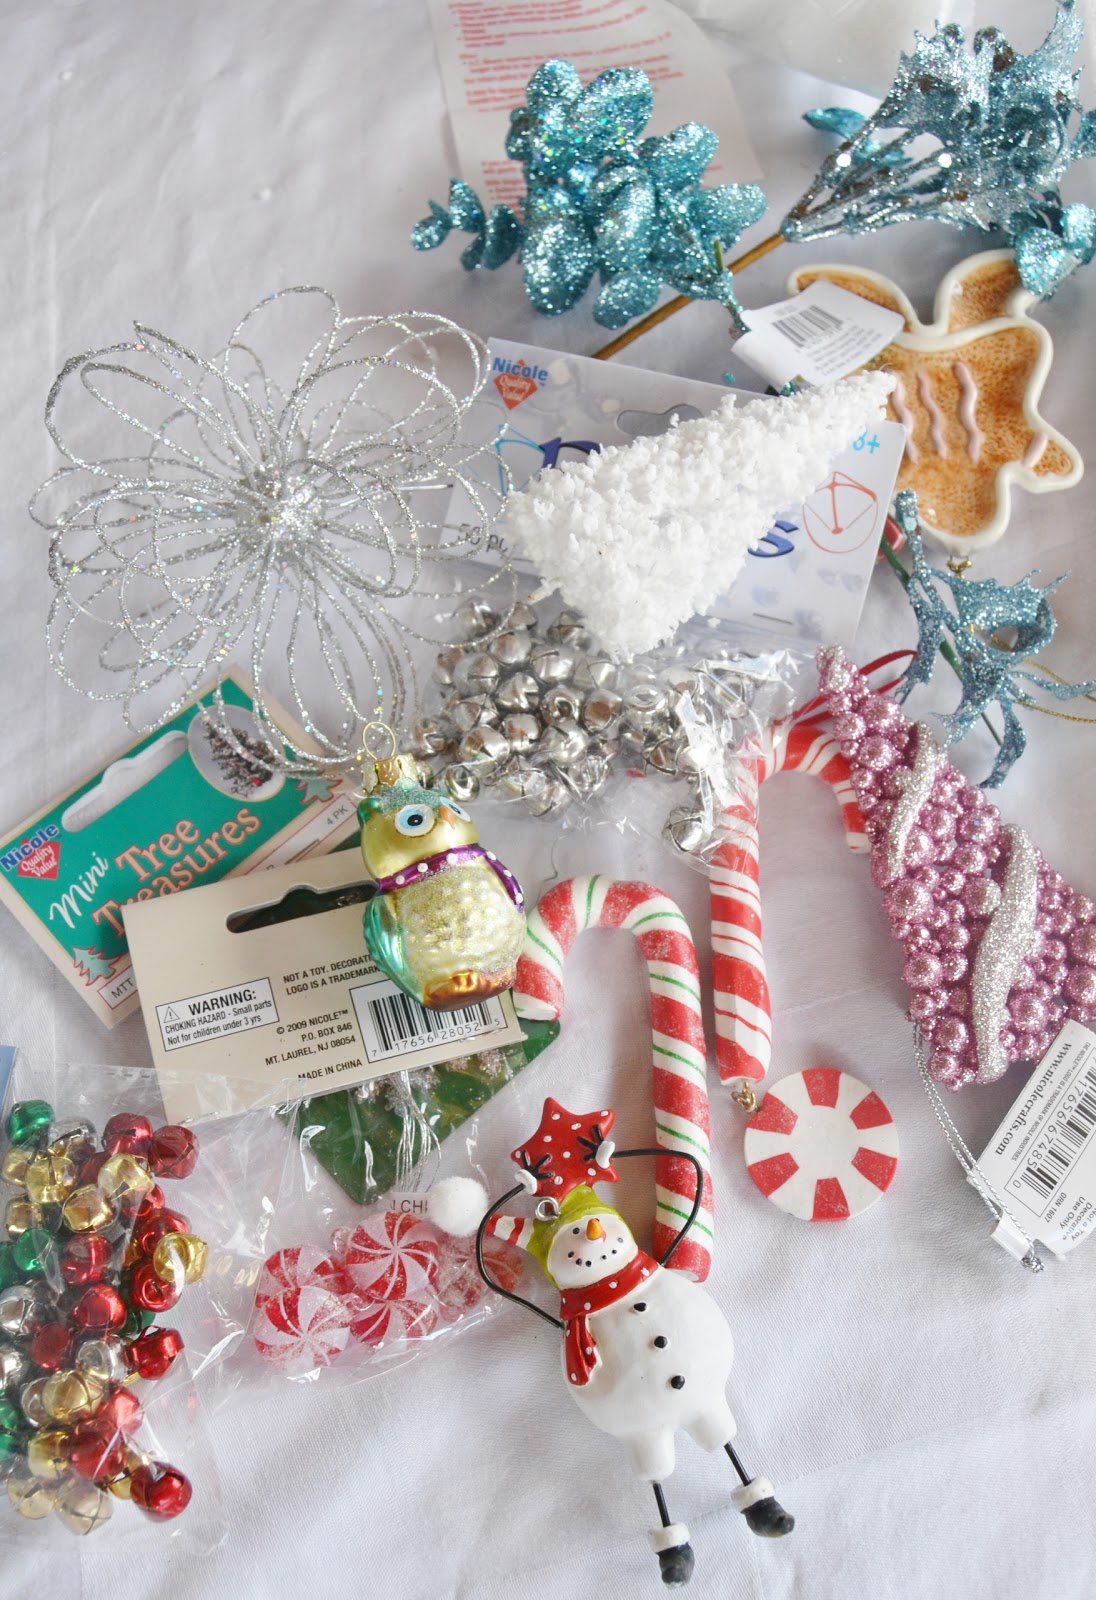 |
| Pretty stuff. Assorted Mini Ornaments from Pier One, AC Moore and the Dollar Store. Some tiny jingle bells, candies and picks with berries. |

I cut a circular piece of Styrofoam out and made sure that the circumference of it, once glued to the lid would still allow the jar to close.
 |
| The thickness of the circle is flexible. Just make sure that it isn't so thick that it takes up too much space in the jar once closed, but thick enough to stabilize the materials when stuck into the Styrofoam. |
 |
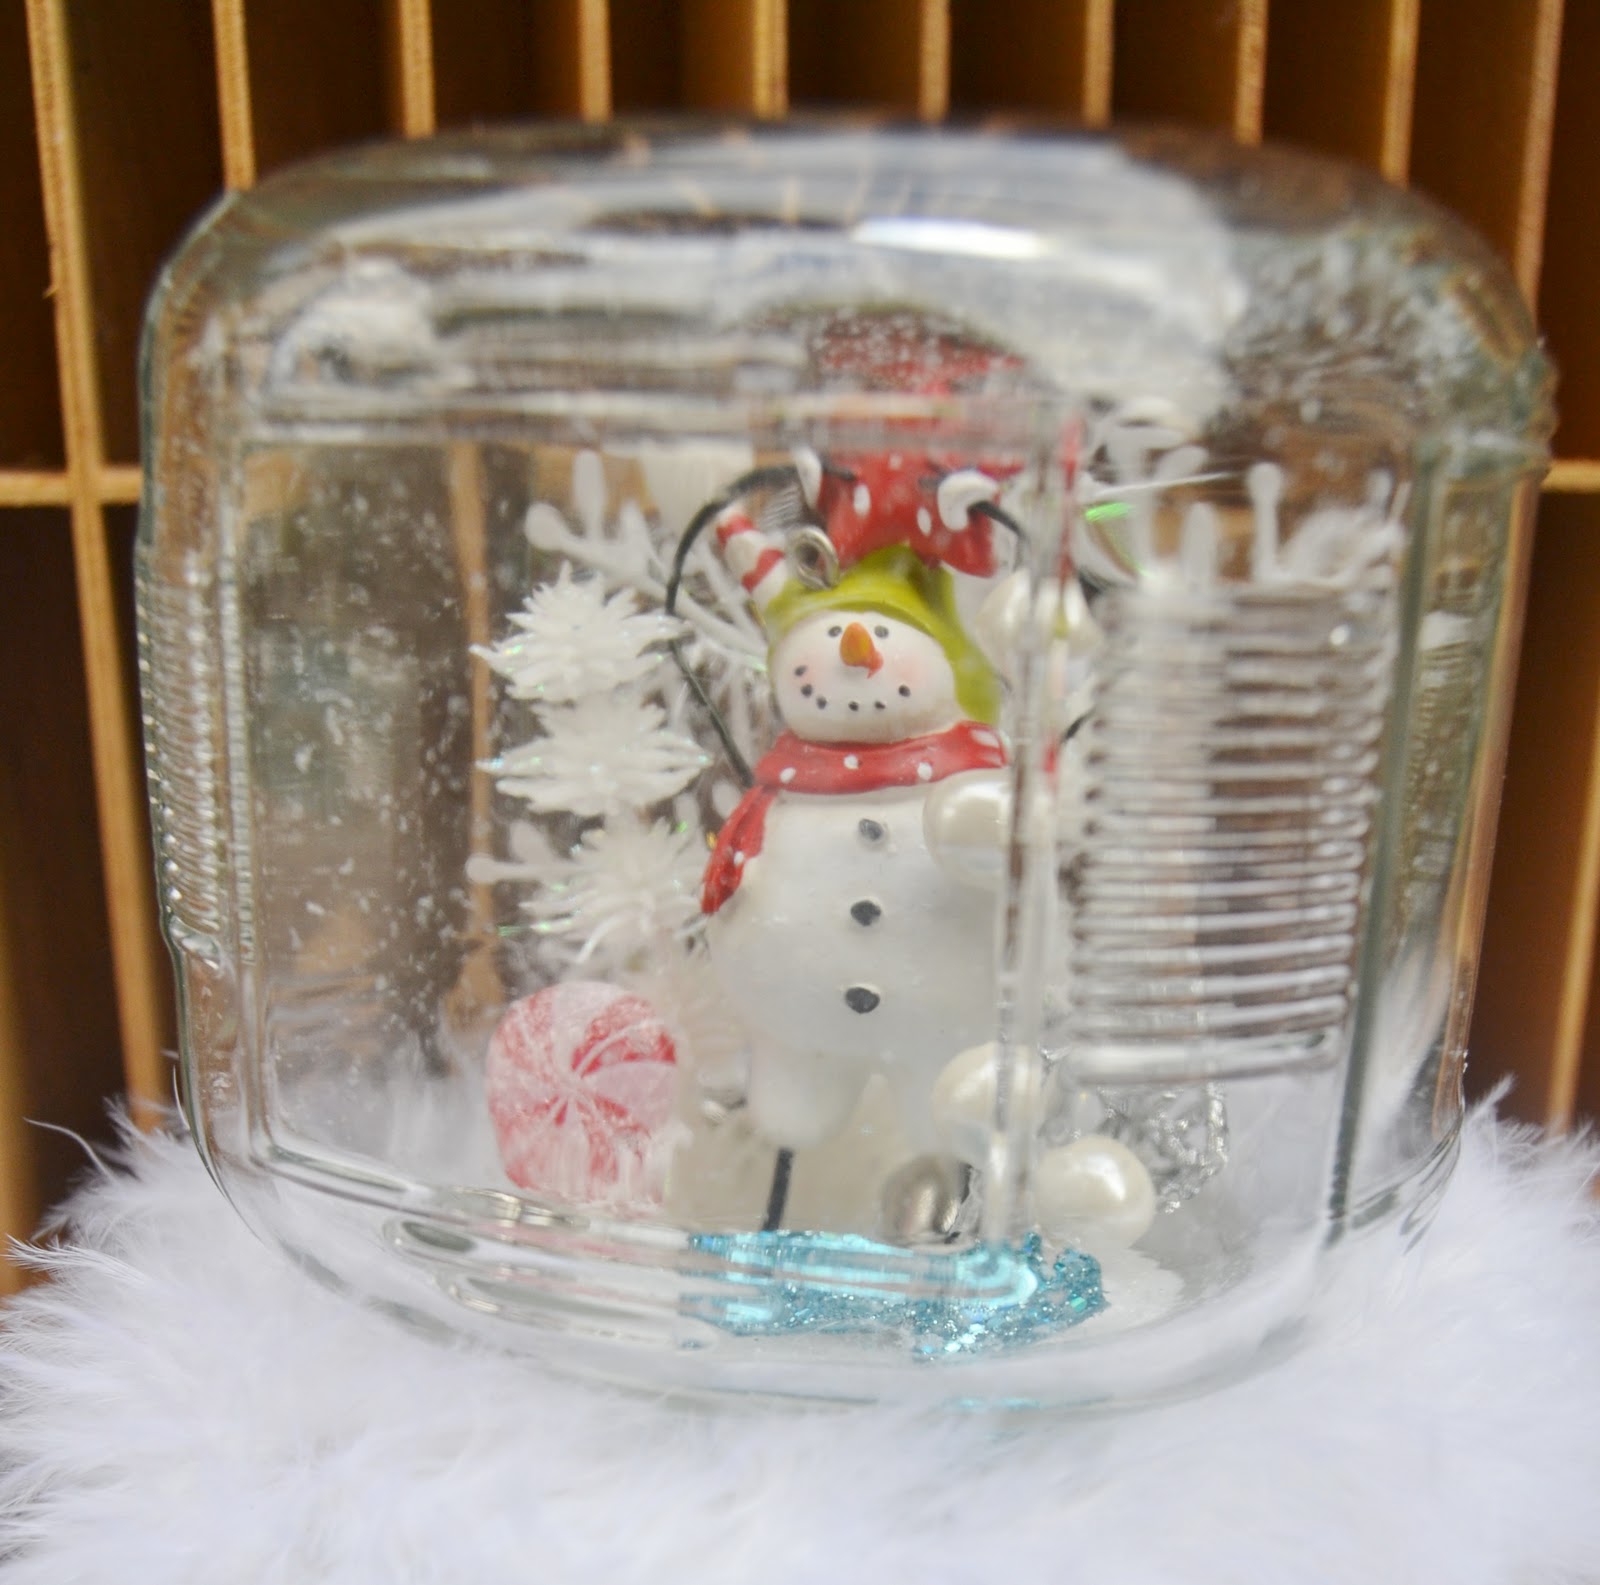
| I added the AC Moore snowman first and then built the area around him varying the height and the visual weight of the other elements around him. |
 |
| A little froggy is stuck in the snow along with jingle bells and candy. Finished the background with a Dollar Store snowflake. I will be adding snow to this scene later, so I glued the jingle bells to little floral sticks, so they would show above the snow. |
 |
| This darling owl is from Pier One Imports. I placed a little snowy Dollar Store tree and a few little picks and baubles, and shake of glitter in with him. |
I added a handful of bagged fresh fallen snow, closed up the lid. Done. Here are my results...


I also wanted to show you what I can up with for my Goodwill jars. I used these jars standing upright because I liked their lids and I wanted to do something different with these two jars. I made a simple snowy tree motif with a few jingle bells in the jar because they are tall and narrow. I then finished off the top with a few leftover birdies from my Bird Nest Ornament Project, a pick and a small bow. Here are the results.


Fun afternoon project that is easily customized for a friend who like....well, frogs! Or for myself, who likes....owls! Yeah me!
We are getting down to the wire friends. I am sure you all are in full holiday mode and busy busy busy. I know I am. The remainder of the projects are geared toward just that. I will finish this week off with quick tips and ideas that might help you in the pinch.
Here's looking at you kid...

Don't forget to come back tomorrow for my
Day 18
of
25 Days of Christmas and Holiday Ideas and Gifts Series!!
-The End-
Featured at:

Featured at:
Linking this post to:


14 comments:
I absolutely love your take on this. Congrats on your feature at Donna's my friend. I was giddy to see your steampunk ornament.
I love what you made - I feel so festive!
Speaking of which, you should share these with the Inspiration Avenue challenge this week where the theme is.. you guessed it... festive!
http://inspiration-avenue-team.blogspot.com/
these are so cute! i love the simple white trees- those are my favorite!
These are adorable! Thanks for the tutorial... I like owls too! ;)
Obviously I have been away way too long! I have caught up on all your adorable ideas! Everything has been fantastic! You should be proud of yourself! Merry Christmas!
Your jars have the look of viewing the snowy scene in a window! It's like a NY Macy's Christmas window!!
Darling. Love them all. I should do this with the girls later next week. Those tall GW jars turned out gorgeous! You should turn this into an ebook for next year! Deb
These are fabulous! Thank you for sharing them with Inspiration Avenue. And thanks for showing how you created them.
We normally just take one photo per entrant, but I may have to cheat a little and pick two, since it is impossible to choose :) I love the little owl, and the triangular jars are beautiful!
Maggie
These turned out really cute, Lesley! I love the ornaments you used. Adorable!
Very neato ! Lovely designs you came up with too !
I remember doing one of these snow globes with baby food jars ...that was way way back when it came in little glass jars
- KAT -
You are so good at tutorial!
I love them all, especially the triangular tree globe, so serene♥
LOVE these! They look like a lot of fun! Thank you for sharing! I'm your newest fan. Please check out bellanest.blogspot.com if you get a chance! Merry Christmas!
LOVE these! They look like a lot of fun! Thank you for sharing! I'm your newest fan. Please check out bellanest.blogspot.com if you get a chance! Merry Christmas!
Oooooh, they are all so pretty!
Hi Lesley,
WOW! These are adorable!!!
Dee
Post a Comment